SGS Academy - How To Buy and Sell a XRPL Based NFT
The sologenic marketplace doubles as both a dex where you can buy, sell and trade crypto and buy some nfts as well. In the upcoming slides, we will do our best to guide you through your journey as a beginner in this space.
Let’s begin with the website. When you type in sologenic.org you should see this front page on your screen. Depending on what you want to do you would make the appropriate selection. For this class, we will cover the nft marketplace. (select explore nft)
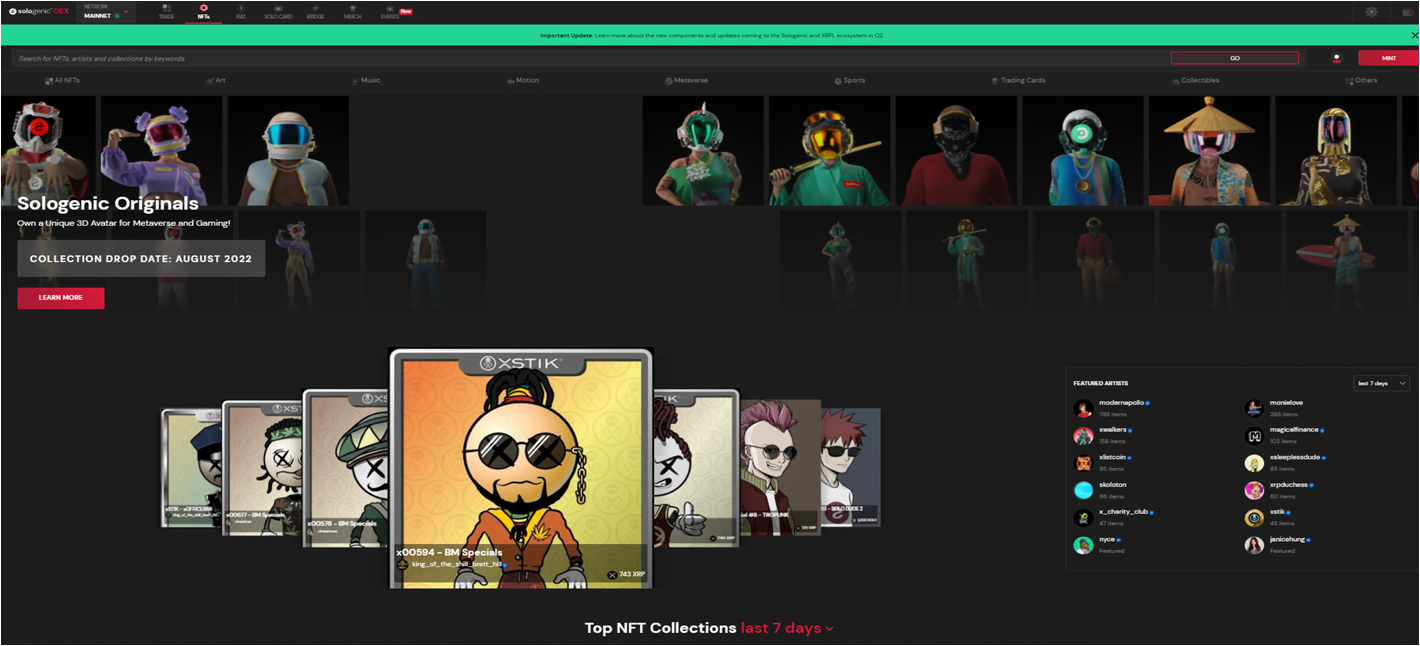
Next, you should be able to see the main marketplace page where you can find top projects, featured artists, newly added collections, and staff picks. You can browse through any nfts on the main page but you can also see all the available nfts in the marketplace by selecting all NFTs. (see purple arrow) if you happen to know what project you want to get into already you may search by the project name, profile, or artist. (See blue arrow)

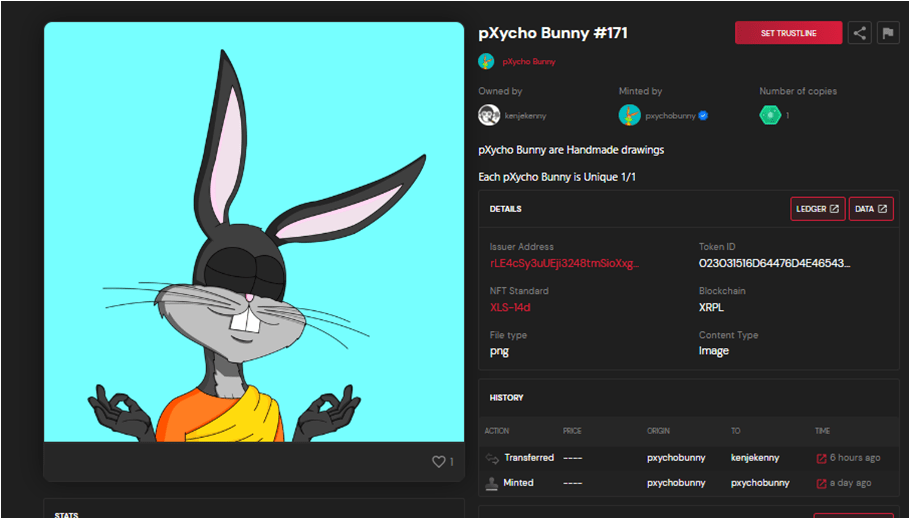
Here’s a view of what you will see after searching for your favorite artist. on this page, you should see the artist’s socials, what they own, their collections, activity, and so on.
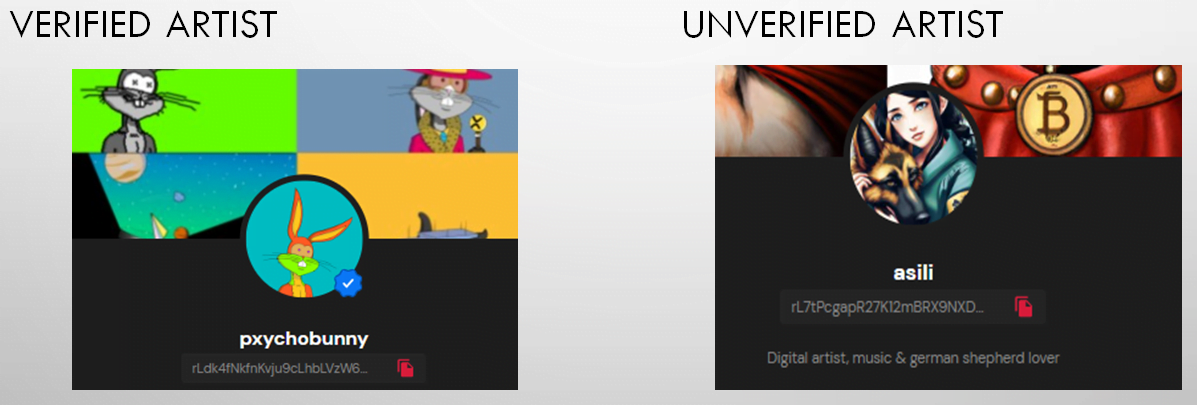
Ready to buy? Not just yet! We here at sgs want to make sure that all of our new members are as equipped as possible when doing their research into these projects. Even though we can’t guarantee or protect you from loss in this space, we can give you helpful tips and tricks that can help reduce and save you from some of the damage. The first thing you want to look at is artist verification. When an artist is verified this means that each artist has gone through a process where a member from the sologenic team takes additional steps to process their verification. This does not guarantee that the artist is safe it just provides an extra layer of security as a new member.
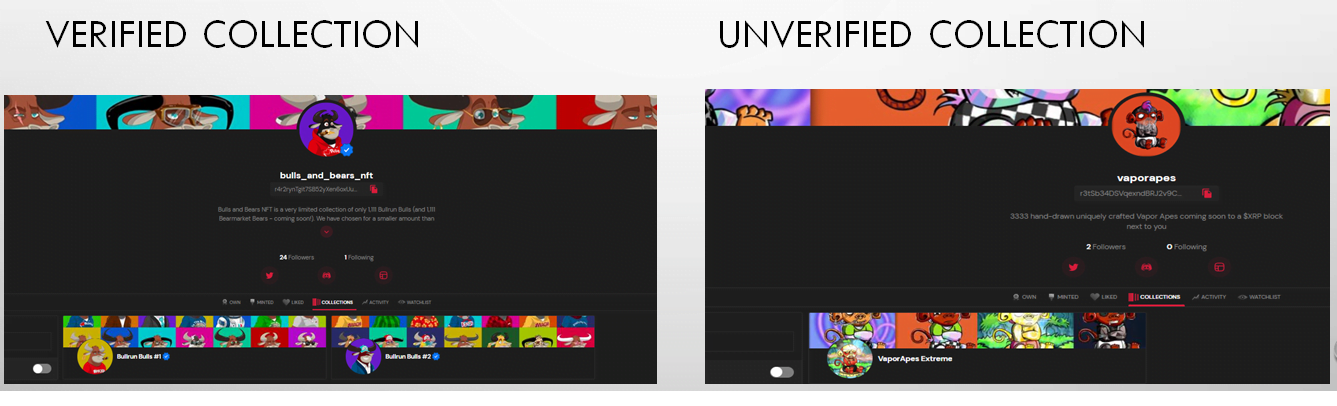
The collection verification process is where each artist sends proof to the sologenic team that the art they are minting has been created by them. This process adds another additional layer of security for new and current investors. We at sgs can’t guarantee any loss when dealing with verified projects but you are more likely to find a successful and good-hearted artist who takes the time to provide the extra layer of security for the community members.
lets get you ready for your first purchase. The first thing we need to get you set up with is a crypto wallet to connect to the marketplace. For demonstration purposes we will show you how to connect and set up your xumm wallet which is a popular wallet that a lot of our community members use. These next couple of sides will guide you step by step in setting up your new xumm wallet.
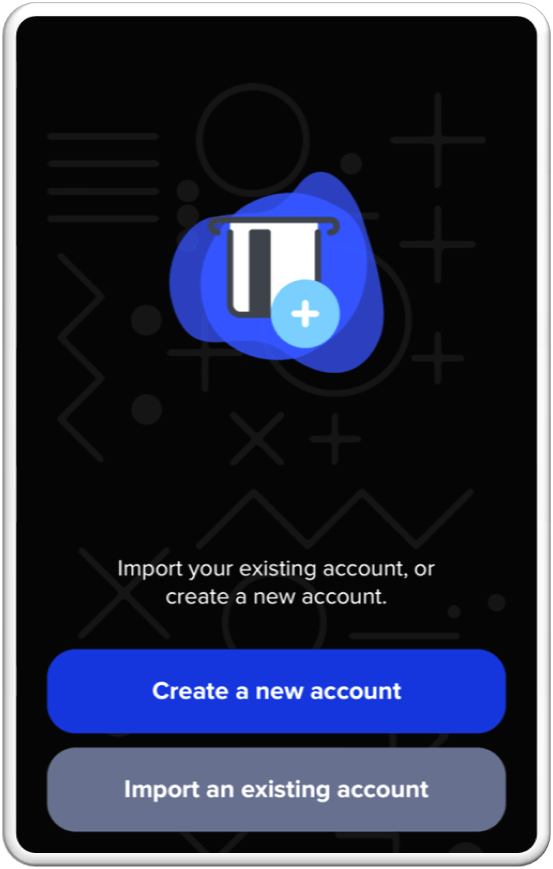
First thing you are going to do is go to your app store on your phone and download the xumm crypto wallet. After you download it select open and begin by creating your account
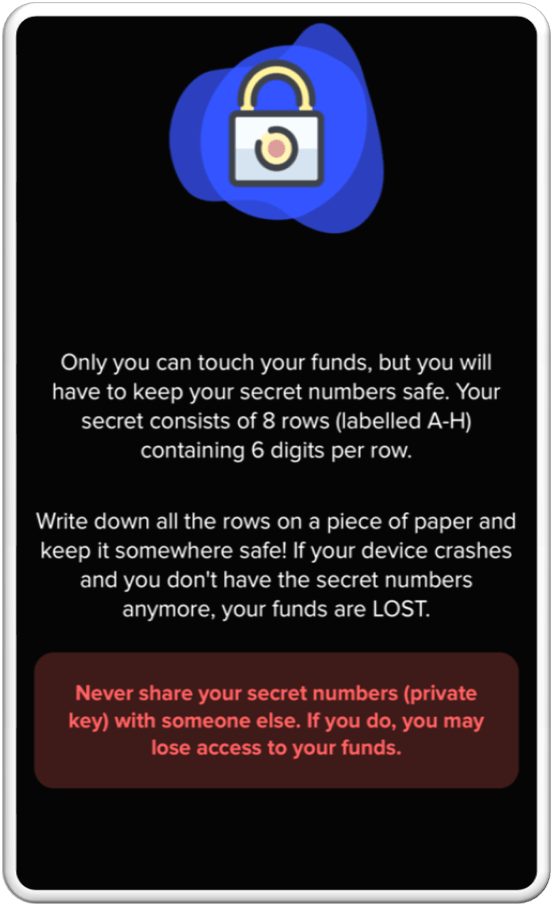
Be sure to read carefully before selecting next, I understand at the bottom of the screen

here is where you will write down everything carefully on a piece of paper and store it somewhere safely. Do not record these numbers on your phone or computer. Check your numbers carefully, then check them once more, then check them again just to be sure! Most importantly do not loose these numbers. If these numbers are lost, you will have no way of recovering your funds! Tip: When getting a new phone, its best to ask other community members all the extra steps they took to transfer everything over to their new devices.
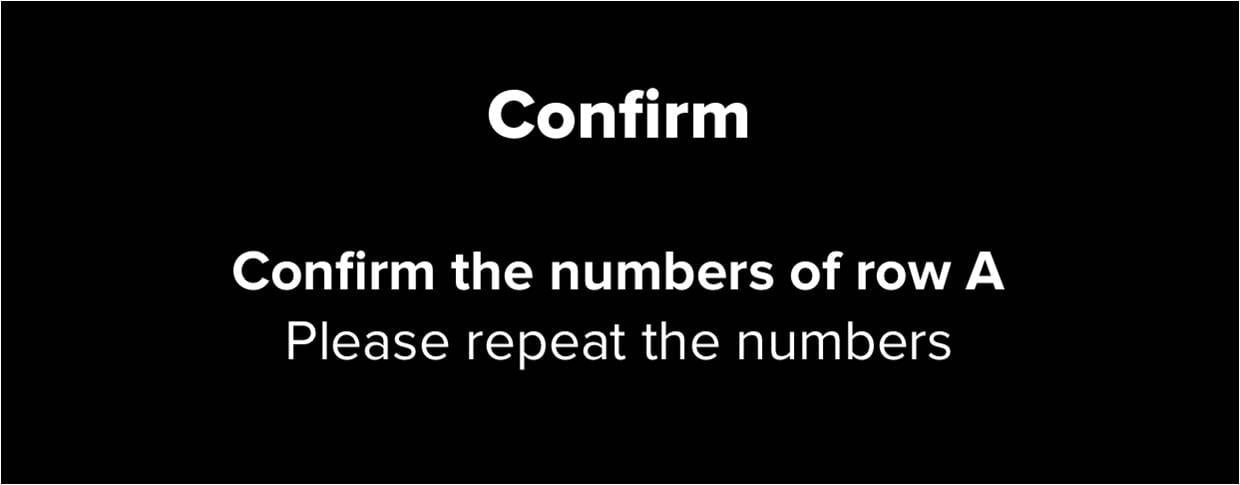
here is where you confirm your secret numbers that you have written down.
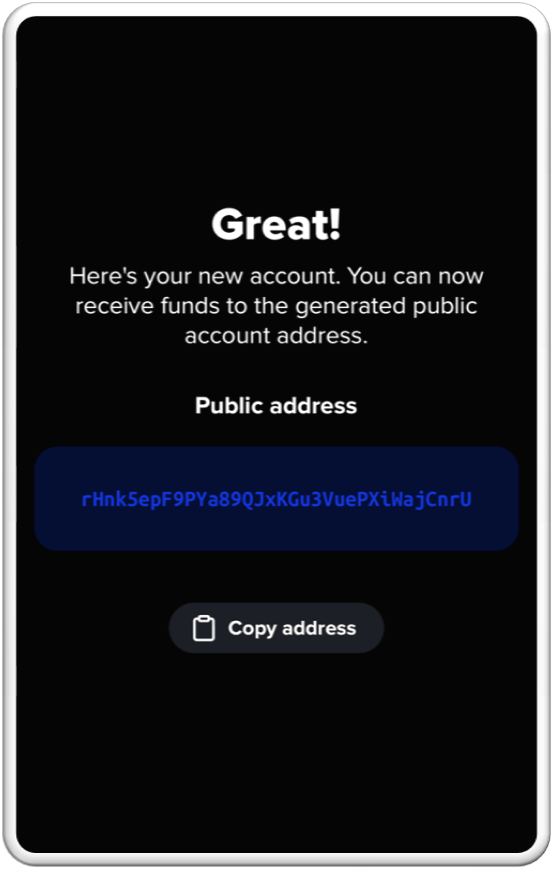
Your wallet has been created, you should see your new wallet address below then click next.

You will need 10xrp for your network reserve! Click next, I understand.
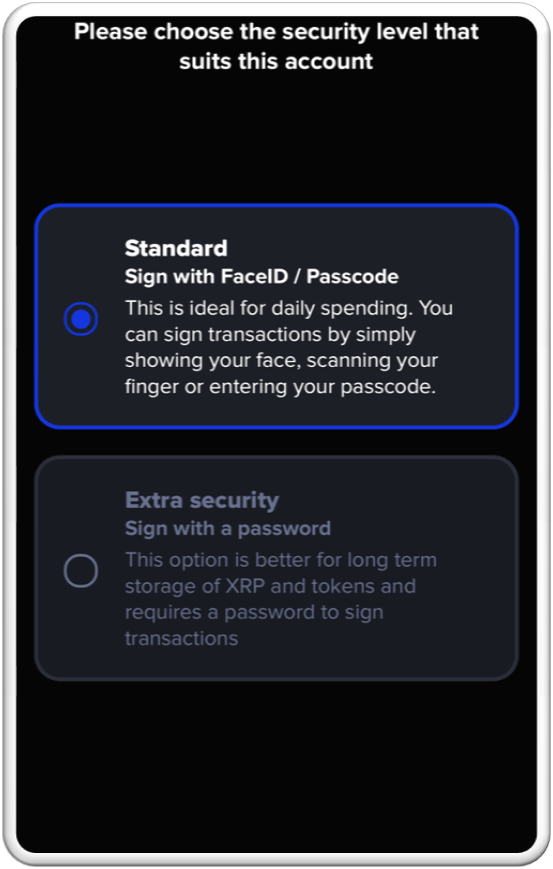
Choose your security preference. Remember to write everything down. Click next.
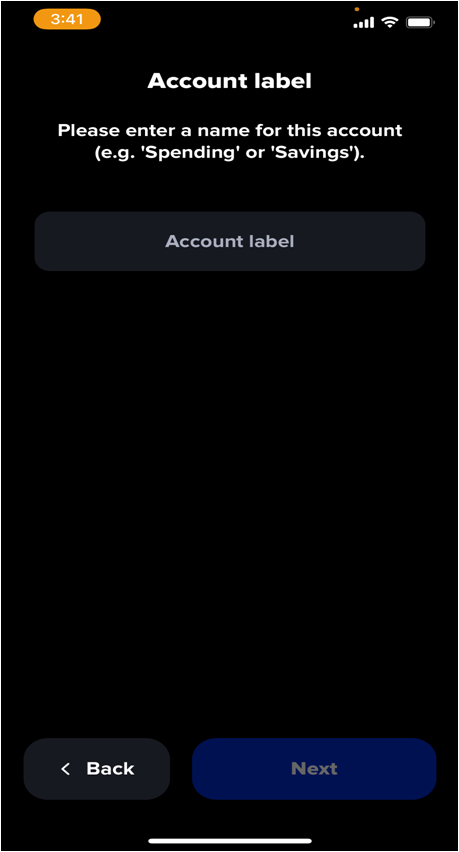
here is where you chose the name for your account. Select next after choosing your name.
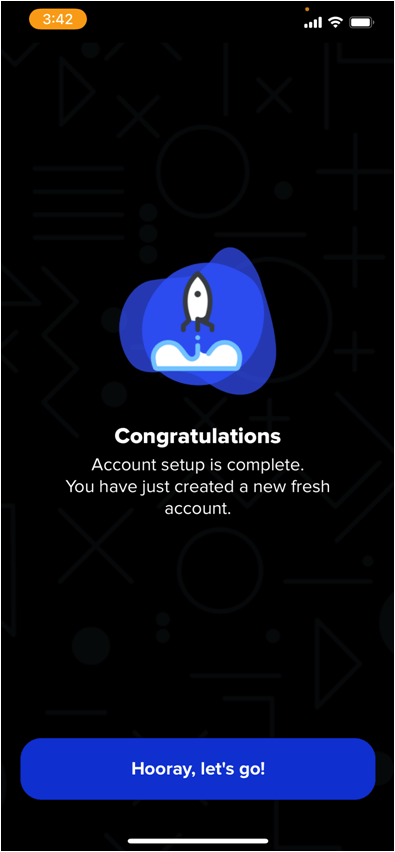
Congratulations, you have successfully created your xumm wallet! Select horray, lets go!

your account will not be fully activated until you have sent over your 10xrp to store in the reserves. Please make sure you use the xumm wallet address you just created to transfer some xrp over. tip: if you plan on making a purchase, transfer over your amount you need to purchase plus the 10 xrp you need to reserve. If you need assistance with this portion please reach out to one of the fellow sgs community members.
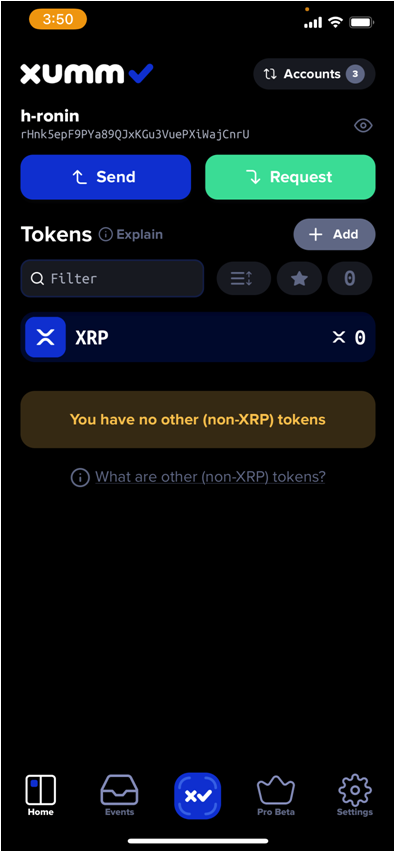
After you have sent over your 10 xrp, your account should be fully activated and now you are ready to go shopping!

Now we are ready to connect your new wallet. To make your first time experience the easiest, its best to use 2 devices. Use a laptop or desktop to access the marketplace and use your phone to access your xumm wallet. You will begin by clicking on the wallet at the top right hand corner of the screen and select connect wallet. (see orange arrow)
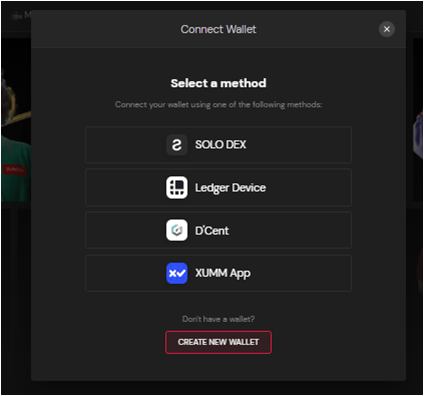
Here is where you will see all the wallet options that you can use to connect to the marketplace.
Select xumm wallet. ( blue arrow)
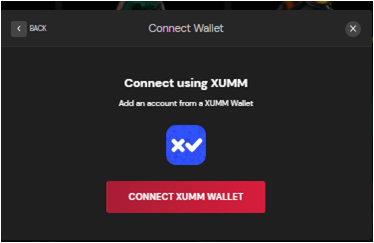
Have your xumm app open and ready on your phone.
Click connect xumm wallet.
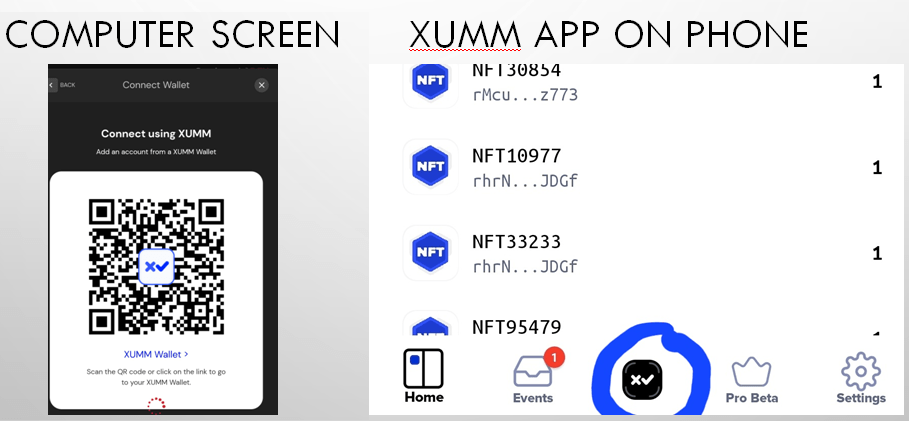
After you click connect wallet a qr code should appear on your computer screen. Proceed by going to your xumm app, log in, and select the middle icon on the bottom of the screen. (see blue circle)
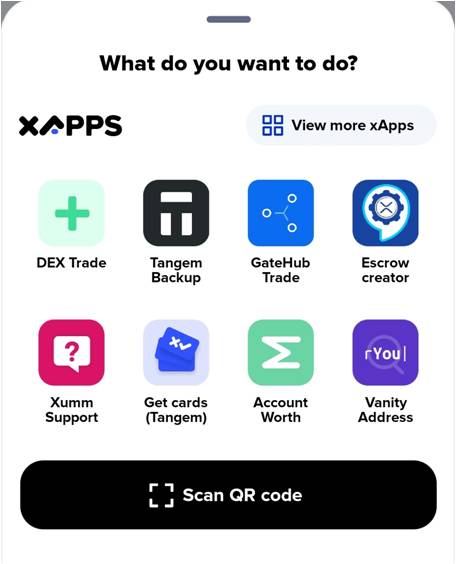
Select scan qr code at the bottom. Then point your phone camera to your computer screen so it can scan the qr code.
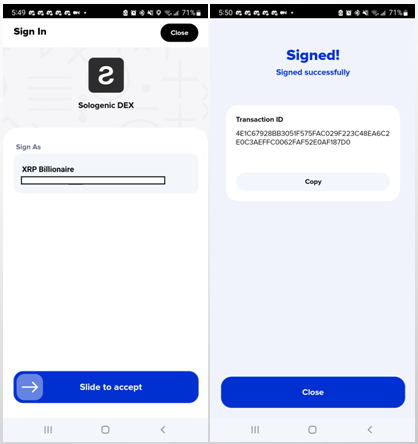
Slide to accept then enter you’re your password or fingerprint to accept. Afterward, you should see a prompt stating that you signed successfully.

Check your computer to see if your wallet has connected successfully. The wallet in the top right corner of your screen should have a green check mark. (see blue arrow). You may disconnect your wallet at any time by clicking on the same icon. If you are not connected, please repeat the previous steps.Tip: we at sgs recommend you disconnect your wallet whenever you are finished transacting on the solo marketplace. This provides you with an extra layer of security to protect your investment.
Now you are officially ready to make your first purchase! Let’s start with a quick overview of trustlines (tl). Think of a trustline as a secure connection between your wallet and that particular nft. A trustline is not needed to make a purchase but is required to make direct transfers from peer to peer.
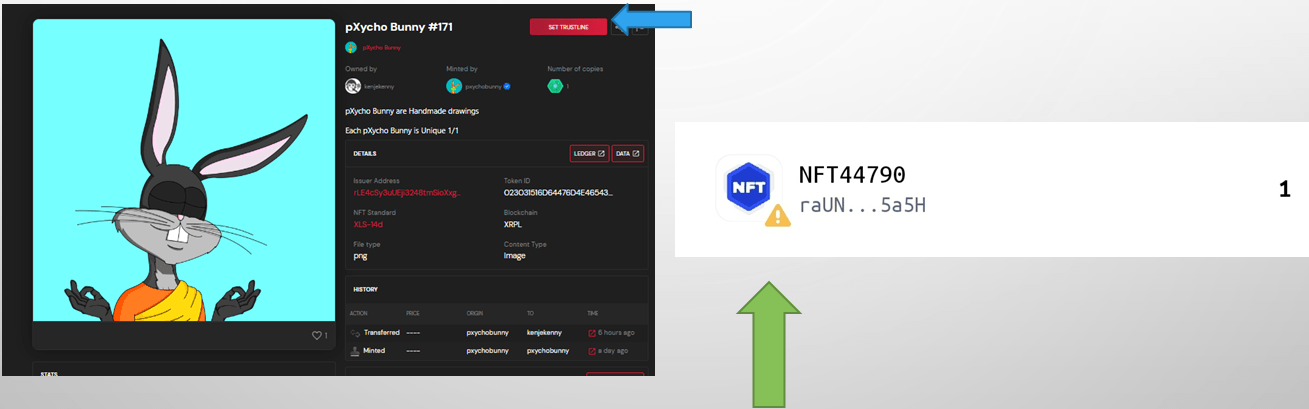
Now you are officially ready to make your first purchase! Let’s start with a quick overview of trustlines (tl). Think of a trustline as a secure connection between your wallet and that particular nft. A trustline is not needed to make a purchase but is required to make direct transfers from peer to peer. It costs 2xrp to set up each trustline. The trustline button should appear towards the top of your screen as a big red button it will appear below the image if you are viewing from your phone. (see blue arrow) if you decide to make a purchase with it will appear in your xumm wallet like this. (see green arrow)
To set up a trustline, make sure you have your phone ready to access your xumm app. Begin by selecting set trustline on your computer.
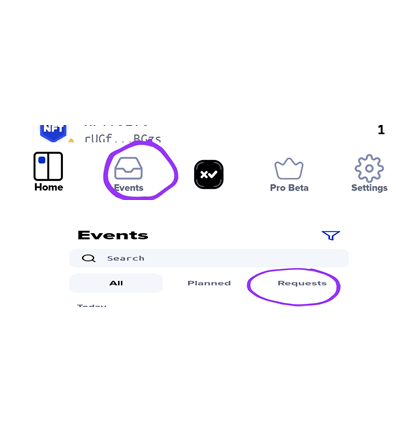
you should have received a prompt on your xumm app requesting that you sign the transaction. If the prompt doesn’t show in about a minute you may look for the transaction under events at the bottom of the app and then select request. (see purple circles)
As the transaction is signed and completed you will see the green prompts on your computer screen. Once completed the set trustline button should change to remove trustline. Follow the same steps if you want to remove.
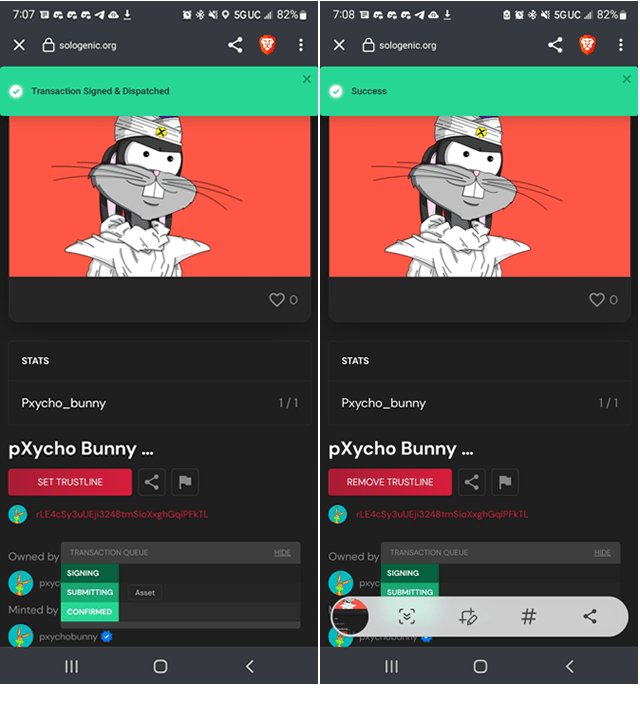
As the transaction is signed and completed you will see the green prompts on your computer screen. Once completed the set trustline button should change to remove trustline. Follow the same steps if you want to remove.
Now that you are familiar with setting trustlines you are ready to purchase your nft.
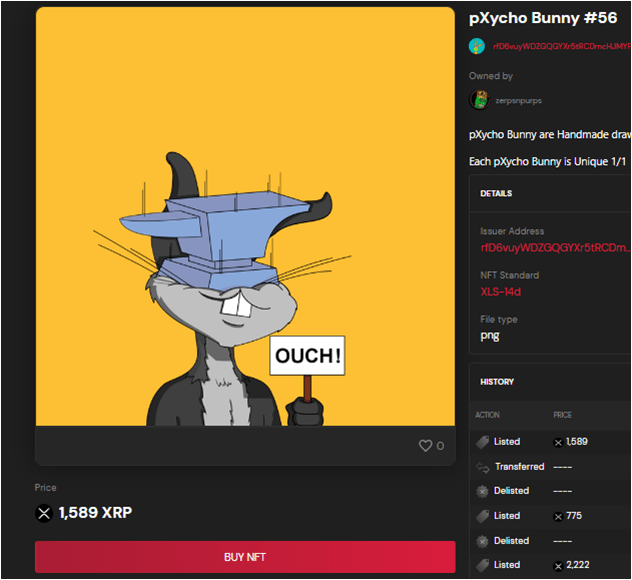
Just like with your trustlines, have your phone ready and Begin by selecting the buy nft button.
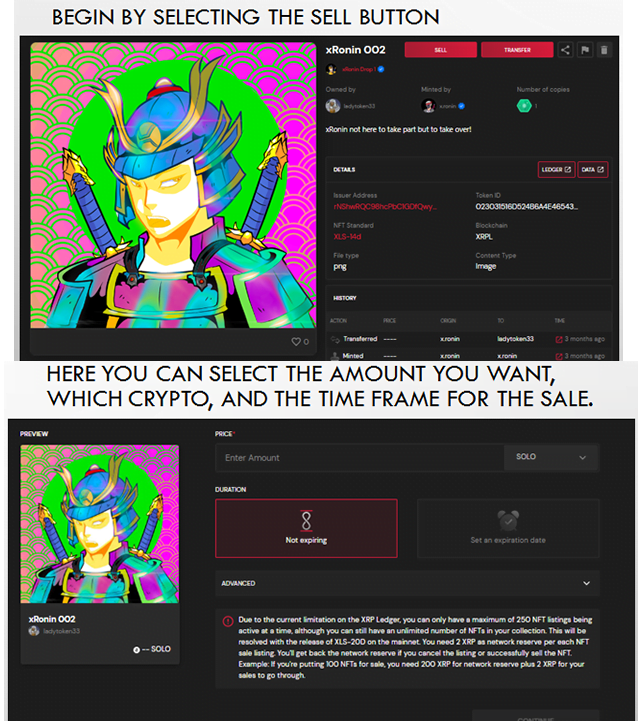
Do you want to try your hand at flipping some nfts for profits? Sgs has you covered with the basic steps you need for selling your nft.
Important: be sure to triple-check which cryptocurrency you want and verify the amount before pressing continue.
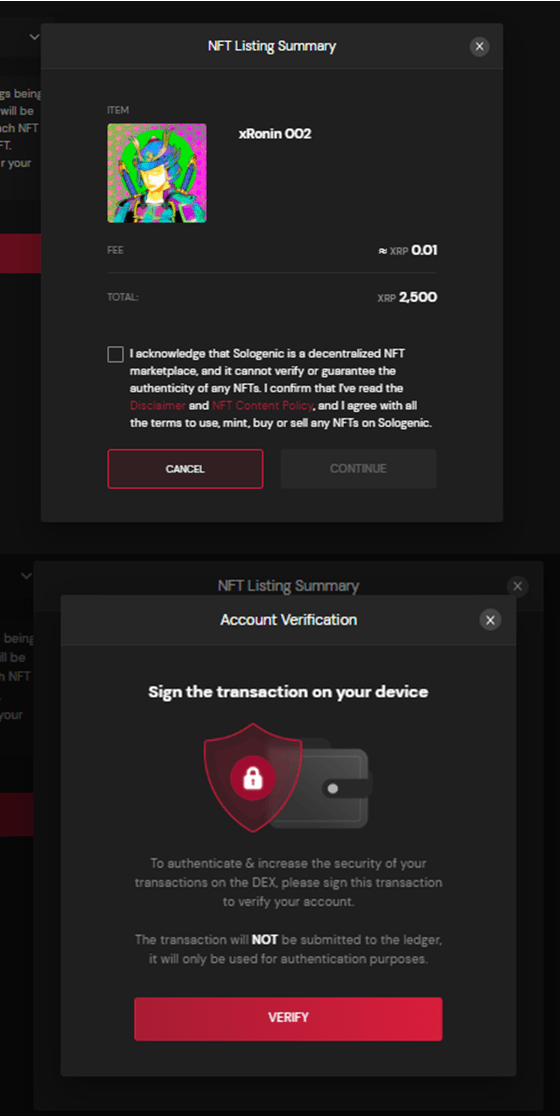
Verify one more time that everything is correct through the nft listing summary. Read and check off the acknowledgment box and then press continue. multiple signatures may be required at times when selling an nft. Select verify then follow the prompts on your xumm wallet.
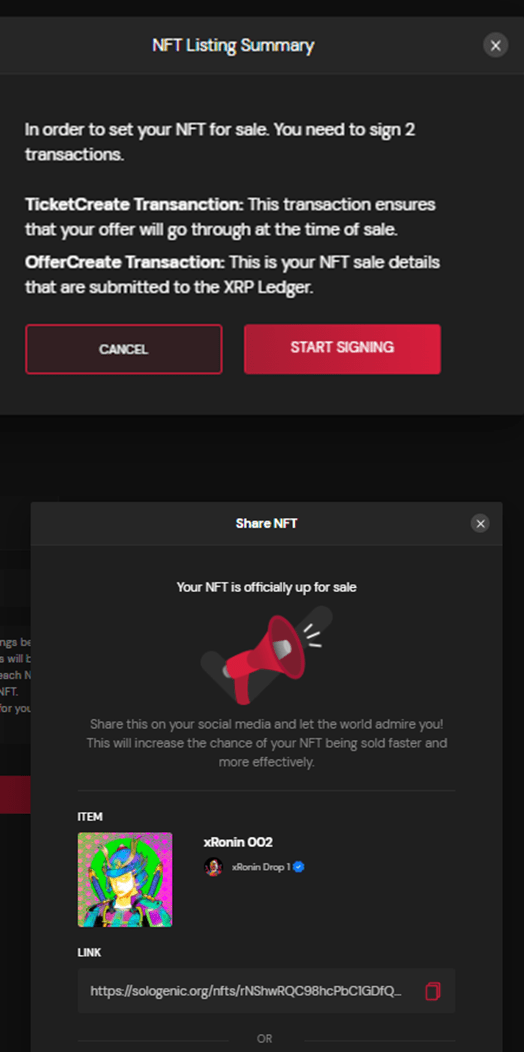
Keep an eye on both your computer and your xumm wallet. Once you select start signing you will get 2 separate transactions that will appear on your xumm wallet. Once you sign both you will get a congratulations notification saying that your nft is up for sale. If it doesn’t work, feel free to try again.